OK, true confessions time. I'm cheating on you guys with another blog. There, I've said it. And I'm afraid that my other blog might be unacceptable to you, as it's only tangentially related to mini games. Oh my. This is getting serious.
For the few of you who actively read my blog, you might know that I enjoy solo gaming with a lot of my minis. I picked up Mythic's Game Master Emulator (GME) as a means to help run the "NPC opponent" in these games. Of course it was only a mater of time before I used GME for it's intended purpose: RPGs.
What started as a small experiment for me with the GME turned into a full blown game. I've been playing a series of Dark Heresy games (hence the tangential connection to this blog) using the GME. It has been a blast and I'm going to stick with it. To that end, I created a blog to specifically address my solo gaming activities.
I invite you to check out my other blog, Solosaurus. It's very new and there are not a lot of posts to read. However, my first complete story arc of a Dark Heresy game is recorded there in a few posts. Click on the Dark Heresy label to get all the posts. I've written up all the sessions, really almost becoming 40K fan fiction. I was finding my way with this at first, but have settled into a stable format now.
If you like what you find, please consider following the blog. I'll be starting up a new story arc for Dark Heresy, and plan on doing Deathwatch very soon. I'm also looking forward to Black Crusade, if it ever gets released. This just opens the door to uber-geekdom, and I've done a bit of Pathfinder and am seriously considering Call of Cthulhu. If I find a good pulp adventure RPG, I might go there too. Anyways, please have a look!
Showing posts with label Solo Games. Show all posts
Showing posts with label Solo Games. Show all posts
Wednesday, September 14, 2011

Sunday, August 7, 2011
28mm WWII: US Reinforcements
I've been steadily chipping away at the mountain of models I accumulated this summer. I think I went on some sort of lead-based feeding frenzy. There's too much to paint for a long time to come. But I've been serious about my 28mm WWII miniatures. I've started with Crusader miniatures and have been filling in gaps with both West Wind and Bolt Action minis. Here's what I've got done.
 First up is the command group pack from Warlord's Bolt Action range. I wanted these for the medic and the grenade launcher. The radio and officer models will be useful in certain scenarios. These models are a little more normally proportioned than the Crusader line. But mixed in with them, the Bolt Action models look fine.
 These are West Wind models from the Snipers and Flamethrowers pack. There are about five snipers and four flame throwers in the package. I painted up two of each, figuring that I wouldn't need more. But there are obviously still some in reserve if I should need them. These models fit in almost perfectly with the Crusader line, and I really like them.

 These two pictures are of West Wind's US .50 cal HMG team package. I like what they've done here, giving the HMG team in set-up and broken down poses. So if you have reason to move them, you've got models to represent that. I chose to put the set up team all on one large base. If the team takes casualties, I can use a token to show it.

 Finally here is West Wind's M5A1 Stuart tank. I forgot to take pictures of a model next to it for scale. But the tank does scale well with the figures. Stuarts were genuinely small tanks and I don't know how four men got into them. The West Wind line of vehicles are a real value. I'm not as concerned with proper scale and making things "just so" as I am with having reasonable representations of the vehicles. I plan to buy some of the larger tanks to see how these scale. I think they are 1/56 scale models.
So my American force now has a little more variety than just straight up rifles and LMGs. Next up for the 28mm WWII project will be my Japanese forces.
As a side note, I've been running a solo campaign with these models. I've been using Flying Lead rules with Nuts! for the solo rules. It has been a blast. I've been keeping a campaign diary, which really helps drive the story. It's also fun to write and re-read, even if it's just for myself. I don't put a lot of work into it, as it's just for me. But I've started to add pictures. Maybe one day I'll post the write ups when the campaign is over. Here's a shot of the US forces accepting the surrender of the remnants of a German panzergrenadier squad that tried to infiltrate US lines. It's one of the US squad's rare victories.

Saturday, July 9, 2011
The Coolest Fantasy Skirmish Game That You Never Heard Of Before
I used to consider Lord of the Rings Strategy Battle Game as the best skirmish fantasy game I had ever played. But over the years every game has become 600+ points with as many models crammed into your list as you can possibly get. My Corsair army has more models than my 40K Space Marines and just about as many as my planned Tau army. Players in both casual and tournament games are generally trying to get as close to the maximum model count of 75 as possible. In short, it's still the best game I ever played. But it's not skirmish and hasn't been for a long time. At least not in my opinion (which I'm sure the world disagrees with, by the way).
So I went searching for a fantasy skirmish game to scratch that itch. It didn't take long to find Song of Blades and Heroes (SBH) by Ganesha Games. I could really end this post now with me just telling you to go spend the $8 for the PDF and get this game. You won't regret it. The game is awesome, and once you play it through a few times you realize what looked like a light and breezy game has a lot of meat to it.
But I'm in the mood to write, lucky for you. Let me introduce the game in more depth, and see if I can't convince you to check it out. Incoming wall of text!
First, it's a skirmish game. Hooray for not needing to buy 50+ models before you can "really play" the game. You use whatever models you have on hand. That was a huge selling point for me. I have a lot of WHFB models gathering dust. Also, I can now buy all those delicious Reaper models that I've wanted, not to mention get some use out of my Warmachine/Hordes stuff. My only complaint is the mish-mash of square and round bases. Can't have it all, I guess.
The overall game structure feels a little like Mordheim mixed with a little Lord of the Rings, plus some standard miniature games rules thrown in. The system is very simple and easy to learn. Best of all, there are no charts to consult or stupid markers to put next to models. (I hate that marker shit... put a marker to show retreating, put a marker to show a charge, put a marker to show that there's a marker next to the model.....)
You build your warband to a 300 pt level, which will get you about 8 - 12 models. You can do more if you want to. But wasn't I just complaining about model bloat in LotR? I've gone up to 400 pts with still less than 20 models. You allocate 1/3 of your points to "personalities" that are models with certain rules. The remainder go to your regular guys. You don't need a leader per se, which is nice.
If you're into models with heavy stat lines, look somewhere else. All models have only two stats, Quality and Combat. That's all you need. The models are then modified by special rules, of which they are many. Those two stats with the special rules make SBH easy to learn and play. Believe it or not, the two stats still embody the stereotypes you expect for certain fantasy races. For example, Dwarfs are rock hard and brave while Orcs are still numerous and run off when things go bad. That all works with two numbers.
The game itself moves quickly and is based on activations. You roll from 1-3 dice per model. Compare the result to your quality score and anything matching or exceeding the number is a success. You can take one action per success. At first I thought I'd hate this aspect, but have found that it's really the heart of the game and ups the strategy factor by quite a bit. In fact, I wish other games had this. The twist is, any time you fail two activation rolls, you will pass your turn back to your opponent. If you rolled three dice, got two failures and one success, you still take your one action. But then the turn goes back to your opponent even if that was your first model activation. So the decisions you make are meaningful and will alter the game. If you have a a 5+ quality model (you must roll 5 or better on a d6 to pass) then you better think twice before rolling for two activations. But what if you want to move and attack a juicy target that you know you could crush? When do you activate that model and will you roll two or more dice? (HINT: Always roll 3 dice on the last model you activate, since two failures don't mean anything at that point.)
As I mentioned there are a slew of special rules. Despite the number of rules, they are easy to understand and memorize. Many are old gaming stand-bys like Hatred, Terror, Fearless, etc. Some were harder to understand, like Drain and Poison. But after a second reading they were easy to get. Special rules can make each model unique, or can define the character of a type of troop. The rules aren't always beneficial (like Coward or Greedy), and negative special rules lower the points cost of the model to compensate.
Combat is fast, but not overly deadly in one-on-ones. That's actually good, since with 10 models a side deadly combat would end the game really fast. Basically, you roll off and add in combat scores plus other modifiers. If I double your score, you are killed. If I triple your score, you die a gruesome death and everyone around takes a morale check. If I just win but don't kill, you either are knocked down or pushed back (recoiled, as they call it). The key is to get models knocked down or "transfixed" with magic. You can kill models in these conditions just by beating them in combat, no need to double a score.
It's time to bring this post home with an old fashioned Pros and Cons analysis.
Pros:
I'll put up a battle rep on one of my solo games. That might help illustrate the rules better. If you've read this far, let me know. I often wonder if anyone plows through all of this verbiage. Thanks for reading!
So I went searching for a fantasy skirmish game to scratch that itch. It didn't take long to find Song of Blades and Heroes (SBH) by Ganesha Games. I could really end this post now with me just telling you to go spend the $8 for the PDF and get this game. You won't regret it. The game is awesome, and once you play it through a few times you realize what looked like a light and breezy game has a lot of meat to it.
But I'm in the mood to write, lucky for you. Let me introduce the game in more depth, and see if I can't convince you to check it out. Incoming wall of text!
First, it's a skirmish game. Hooray for not needing to buy 50+ models before you can "really play" the game. You use whatever models you have on hand. That was a huge selling point for me. I have a lot of WHFB models gathering dust. Also, I can now buy all those delicious Reaper models that I've wanted, not to mention get some use out of my Warmachine/Hordes stuff. My only complaint is the mish-mash of square and round bases. Can't have it all, I guess.
The overall game structure feels a little like Mordheim mixed with a little Lord of the Rings, plus some standard miniature games rules thrown in. The system is very simple and easy to learn. Best of all, there are no charts to consult or stupid markers to put next to models. (I hate that marker shit... put a marker to show retreating, put a marker to show a charge, put a marker to show that there's a marker next to the model.....)
You build your warband to a 300 pt level, which will get you about 8 - 12 models. You can do more if you want to. But wasn't I just complaining about model bloat in LotR? I've gone up to 400 pts with still less than 20 models. You allocate 1/3 of your points to "personalities" that are models with certain rules. The remainder go to your regular guys. You don't need a leader per se, which is nice.
If you're into models with heavy stat lines, look somewhere else. All models have only two stats, Quality and Combat. That's all you need. The models are then modified by special rules, of which they are many. Those two stats with the special rules make SBH easy to learn and play. Believe it or not, the two stats still embody the stereotypes you expect for certain fantasy races. For example, Dwarfs are rock hard and brave while Orcs are still numerous and run off when things go bad. That all works with two numbers.
The game itself moves quickly and is based on activations. You roll from 1-3 dice per model. Compare the result to your quality score and anything matching or exceeding the number is a success. You can take one action per success. At first I thought I'd hate this aspect, but have found that it's really the heart of the game and ups the strategy factor by quite a bit. In fact, I wish other games had this. The twist is, any time you fail two activation rolls, you will pass your turn back to your opponent. If you rolled three dice, got two failures and one success, you still take your one action. But then the turn goes back to your opponent even if that was your first model activation. So the decisions you make are meaningful and will alter the game. If you have a a 5+ quality model (you must roll 5 or better on a d6 to pass) then you better think twice before rolling for two activations. But what if you want to move and attack a juicy target that you know you could crush? When do you activate that model and will you roll two or more dice? (HINT: Always roll 3 dice on the last model you activate, since two failures don't mean anything at that point.)
As I mentioned there are a slew of special rules. Despite the number of rules, they are easy to understand and memorize. Many are old gaming stand-bys like Hatred, Terror, Fearless, etc. Some were harder to understand, like Drain and Poison. But after a second reading they were easy to get. Special rules can make each model unique, or can define the character of a type of troop. The rules aren't always beneficial (like Coward or Greedy), and negative special rules lower the points cost of the model to compensate.
Combat is fast, but not overly deadly in one-on-ones. That's actually good, since with 10 models a side deadly combat would end the game really fast. Basically, you roll off and add in combat scores plus other modifiers. If I double your score, you are killed. If I triple your score, you die a gruesome death and everyone around takes a morale check. If I just win but don't kill, you either are knocked down or pushed back (recoiled, as they call it). The key is to get models knocked down or "transfixed" with magic. You can kill models in these conditions just by beating them in combat, no need to double a score.
It's time to bring this post home with an old fashioned Pros and Cons analysis.
Pros:
- Skirmish based, play with any fantasy models you have
- Simple rules that encompass just about everything. You only need three dice and a tape measure.
- Price: Pay $8 for the main rules and bring your own background fluff. You've got a full blown game in hand for about the price of a fast food lunch.
- Tactical and strategic depth of play
- Lots of expansions available to add more to the game, also low priced or available as a bundle.
- Strong narrative component: This game just begs you to create your own narrative for your warband and it's battles. The campaign expansion book takes that home nicely.
- Design your own model stats and points with a free Excel worksheet. Now that six armed demoness sitting on my table will have a gaming purpose.
- Adaptable to historical games.
- Highly solo friendly!
- Additional rules, rosters, and FAQs are spread out over the expansions. Looking up stuff is sort of ridiculous like that.
- You move in a straight line always. So taking a corner will cost two activations. I know the rules are trying to be simple, but come on!
- Minor complaint: gear doesn't seem to matter too much. It's supposedly figured into the models quality and combat scores. But I'd like for a massive battle axe to count for something more! (I was happy when one of the expansions introduced the Heavy Armor special rule. I'd like more of that.)
- Potential to "game the system" and create unbalanced lists. You just have to agree with your opponent on what is fair, otherwise it could be a power gamer's paradise.
- No one is going to play this game with you. "Their game" is so much better and SBH is too blah, blah, blah (I'm sure they'll find something less than perfect to bitch about.)
I'll put up a battle rep on one of my solo games. That might help illustrate the rules better. If you've read this far, let me know. I often wonder if anyone plows through all of this verbiage. Thanks for reading!
Monday, June 6, 2011
Mythic GM Emulator for Solo Games
I've been clearing out closet space recently. When I started playing miniature war games several years ago I bought up just about every "big name game" I could find. So you can imagine what I uncovered in my closets: boxes of fully assembled, lovingly painted and totally unused armies.
The most regrettable find was all my Warhammer Fantasy Battle armies. I can't bring myself to sell these. But no one in my local group plays this game, and I don't feel like doing pick up games at the local game store. In fact, doing pick up games in the local game store almost caused me to drop out of the hobby completely. The total suckage of pick up games could be a post in itself.
But by now you are wondering how this post's title connects with my article. Let me explain.
I took out my WHFB boxes from the closet, looked at the models and wanted to play a game with them. I also wanted to renew my collection of WHFB models, and have a purpose for doing so. I considered what I'd enjoy. The story-driven, skirmish game Mordheim sounded right for this. So I pulled out my rulebook, threw some Orcs on the table and started to push these around. I did this to refresh myself on the rules, which reminded me of 6th ed WHFB (where I left off with that game; I'm two editions behind now). Having done that, I decided I'd like to actually play a game.
This is where Mythic's GM Emulator (GME) made all the difference. Originally created to allow GMs to run their RPGs without preparation or to play without a GM, the GME fits war gaming as well. I heard about the GME's use from some forums, and doubted if it would work. But I'm a sucker for these types of things and I plunked down the $6.95 to find out. I'm glad I did.
So here's a quick explanation of how it works. You ask a yes or no question, then determine the odds for a "yes". You check these odds on a table, and roll a d100. If you roll within the percentage given, then your answer is yes. Depending on how you score, you can also end up with an exceptional yes or exceptional no response. Other conditions, such as scoring doubles (22, 33, 99, etc) yield a random event. The success of this system hinges on asking intelligent questions and not dumb ass things like "Do I automatically win the game?" Additionally, as the game progresses, things can become more or less "chaotic" which will also influence the percentages. It's a neat system.
The net result was that my NPC opponent did things that I did not expect and moved more or less like someone else was controlling these models. That's the perfect situation for solo play. Also, with solo play you are allowed to do things like have random events that are not strictly in the rules. The GME helps add those in without any preparation or effort on your part, and these events will always be different. An example of play will probably help with understanding how GME works.
Meet the "Bloody Eye Boyz" These orcs are survivors from a recently sundered Waaagh! led by a now dead orc boss. Time for a new boss! Havak Dreadeye has pounded a few other boyz and gobbos into service to his Bloody Eye Boyz. Uglug Bashead and Durg Smashface are Big 'Uns that help keep the boyz and gobbos in line. They're now wandering the countryside, looking for plunder and violence. They've heard an abandoned home at the edge of town still might have some loot. When they arrive, some of the other boyz from the last Waaagh! are there already. This is great news! A fight is just what Havak and the boyz were hoping to enjoy!
 After I set up the terrain, I deploy Havak and his boyz. I divide up the NPC deployment zone into three equal sectors. So while I could've used the GME to deploy them, it was faster to roll a d3 for each model to see where it starts. Since recently my dice don't roll higher than 2, all NPCs ended up in the first zone behind a small shed and a small wooded area. I went first and took my moves, deciding to walk into the zone so my Night Goblin archers could fire bows and that the other boyz would be ready to respond the following turn.
As an aside, Animosity was simply out of control the entire game. I rolled one after one after one after one, until I canned those dice and got out my lucky Vegas dice. Then things got better and I could actually play the game! My Chessex dice cube is malfunctioning again. My casino dice are far more consistent. OK, back to the game.
It's time for the NPC to move. Since this is a test game, I just made a simple band to fight against. There are six Orcs, one Big Un and a Orc Boss in the NPC team, no magic or shooting. After handling their animosity, I ask if the first Orc will go thru the woods. Since he's eager for the fight, I assume he will not want to slow down and make the odds "Unlikely." I roll the dice and get a 5%. Not only does this mean the answer is "Yes" but it is an "exceptional Yes." (5% is in the lower 1/5 of the success range). It's up to me to interpret what this means. So he's definitely going into the woods, and he's really determined. I treat the "exceptional" part to mean he moved like he rolled a 6 on his Animosity chart. This means he gets an extra move above his normal move. He ends up not only going thru the woods, but he exits the same turn. Well done!
I now ask if the other boyz will follow him. I assume seeing their buddy's enthusiasm, they are now likely to follow. They don't want to be left out of the fight! So I roll and score within the 75% success range. They head off thru the woods. I ask for the Big Un and the boss as well, but they prefer to move up the center. I also ask if they would run. I determine that this is very likely because they don't want to get shot and want to get to the fight. However, I roll 87% and they decide to move more cautiously.
I could continue with the report, but won't bother. Now you can see that as long as you ask logical questions the NPC will move and act independently of your influence. I used this method to determine NPC charges, weapons selection, and other things that another player would do. While it sounds like a lot of work, you're really just working it out in your head. It takes only a moment to mentally ask the question and check the result. Once models are in combat, the normal game rules take over and it's just a matter of rolling dice. Using the GME with my Mordheim game, the story unfolded and I was really interested to see how Havak and the boyz would do.


 Turns out Havak and his boyz were the "biggest and bestest" 'ead bashers around. Havak took out the opposing Big Boss while Uglug, Durg, and the other boyz smashed head as well. When the opposing orcs took 25% casualties, they fled the field. Why stick around when the boss was dead? I rolled up Havak's treasure and awarded XP. Havak now has some cash to spend. He also has got to round up the other orcs in the area. No reason they should be listening to anyone but him, right? Stay tuned for more of his story.
So if you are a solo gamer or would just like to try something different, give the Mythic GM Emulator a chance. You could even use it to add some randomness to your regular games as well. I've only introduced the basics of it. Since it's an RPG tool, you can imagine it has a lot of story elements in it as well. For the seven bucks it costs, you can get a lot of mileage out of it.
The most regrettable find was all my Warhammer Fantasy Battle armies. I can't bring myself to sell these. But no one in my local group plays this game, and I don't feel like doing pick up games at the local game store. In fact, doing pick up games in the local game store almost caused me to drop out of the hobby completely. The total suckage of pick up games could be a post in itself.
But by now you are wondering how this post's title connects with my article. Let me explain.
I took out my WHFB boxes from the closet, looked at the models and wanted to play a game with them. I also wanted to renew my collection of WHFB models, and have a purpose for doing so. I considered what I'd enjoy. The story-driven, skirmish game Mordheim sounded right for this. So I pulled out my rulebook, threw some Orcs on the table and started to push these around. I did this to refresh myself on the rules, which reminded me of 6th ed WHFB (where I left off with that game; I'm two editions behind now). Having done that, I decided I'd like to actually play a game.
This is where Mythic's GM Emulator (GME) made all the difference. Originally created to allow GMs to run their RPGs without preparation or to play without a GM, the GME fits war gaming as well. I heard about the GME's use from some forums, and doubted if it would work. But I'm a sucker for these types of things and I plunked down the $6.95 to find out. I'm glad I did.
So here's a quick explanation of how it works. You ask a yes or no question, then determine the odds for a "yes". You check these odds on a table, and roll a d100. If you roll within the percentage given, then your answer is yes. Depending on how you score, you can also end up with an exceptional yes or exceptional no response. Other conditions, such as scoring doubles (22, 33, 99, etc) yield a random event. The success of this system hinges on asking intelligent questions and not dumb ass things like "Do I automatically win the game?" Additionally, as the game progresses, things can become more or less "chaotic" which will also influence the percentages. It's a neat system.
The net result was that my NPC opponent did things that I did not expect and moved more or less like someone else was controlling these models. That's the perfect situation for solo play. Also, with solo play you are allowed to do things like have random events that are not strictly in the rules. The GME helps add those in without any preparation or effort on your part, and these events will always be different. An example of play will probably help with understanding how GME works.
Meet the "Bloody Eye Boyz" These orcs are survivors from a recently sundered Waaagh! led by a now dead orc boss. Time for a new boss! Havak Dreadeye has pounded a few other boyz and gobbos into service to his Bloody Eye Boyz. Uglug Bashead and Durg Smashface are Big 'Uns that help keep the boyz and gobbos in line. They're now wandering the countryside, looking for plunder and violence. They've heard an abandoned home at the edge of town still might have some loot. When they arrive, some of the other boyz from the last Waaagh! are there already. This is great news! A fight is just what Havak and the boyz were hoping to enjoy!

As an aside, Animosity was simply out of control the entire game. I rolled one after one after one after one, until I canned those dice and got out my lucky Vegas dice. Then things got better and I could actually play the game! My Chessex dice cube is malfunctioning again. My casino dice are far more consistent. OK, back to the game.
It's time for the NPC to move. Since this is a test game, I just made a simple band to fight against. There are six Orcs, one Big Un and a Orc Boss in the NPC team, no magic or shooting. After handling their animosity, I ask if the first Orc will go thru the woods. Since he's eager for the fight, I assume he will not want to slow down and make the odds "Unlikely." I roll the dice and get a 5%. Not only does this mean the answer is "Yes" but it is an "exceptional Yes." (5% is in the lower 1/5 of the success range). It's up to me to interpret what this means. So he's definitely going into the woods, and he's really determined. I treat the "exceptional" part to mean he moved like he rolled a 6 on his Animosity chart. This means he gets an extra move above his normal move. He ends up not only going thru the woods, but he exits the same turn. Well done!
I now ask if the other boyz will follow him. I assume seeing their buddy's enthusiasm, they are now likely to follow. They don't want to be left out of the fight! So I roll and score within the 75% success range. They head off thru the woods. I ask for the Big Un and the boss as well, but they prefer to move up the center. I also ask if they would run. I determine that this is very likely because they don't want to get shot and want to get to the fight. However, I roll 87% and they decide to move more cautiously.
I could continue with the report, but won't bother. Now you can see that as long as you ask logical questions the NPC will move and act independently of your influence. I used this method to determine NPC charges, weapons selection, and other things that another player would do. While it sounds like a lot of work, you're really just working it out in your head. It takes only a moment to mentally ask the question and check the result. Once models are in combat, the normal game rules take over and it's just a matter of rolling dice. Using the GME with my Mordheim game, the story unfolded and I was really interested to see how Havak and the boyz would do.


So if you are a solo gamer or would just like to try something different, give the Mythic GM Emulator a chance. You could even use it to add some randomness to your regular games as well. I've only introduced the basics of it. Since it's an RPG tool, you can imagine it has a lot of story elements in it as well. For the seven bucks it costs, you can get a lot of mileage out of it.
Saturday, May 21, 2011
Nuts! Don't Miss This Review!
I really enjoy WWII games. Back in High School a friend of mine introduced me to Advanced Squad Leader. Despite a learning curve that rivaled a post graduate degree in supply chain management, I got hooked. In the early 90s, Steel Panthers and other games by SSI continued to excite me. So it is strange that when I started looking to table top war games I didn't hone in on WWII. I only recently picked up FoW. But I've been wanting to do something in 28mm. I have it on good authority that there aren't many satisfying 28mm WWII rules.
Enter Nuts! by Two Hour Wargames. Doing WWII at a skirmish level is what I wanted, just taking a platoon or so. (Flames of War is my game for company level action.) I read the website, liked what was described, thought that this rules set might be the thing for me. Interestingly enough, the game can be played traditionally in a head-to-head game, or as co-op or solo play. In fact, the rules are geared toward co-op/solo. So that sold me the rules. I got the PDF file as soon as I sent payment, and the printed rule book arrived in a few days. Here are my impressions and a short battle report. Don't miss the report!
The rules are unlike anything I've seen before. The core difference in Nuts! is in the use of the Reaction System. I was not ready for that when I opened the rulebook. Turns out, you can get a couple of free rules sets that will give you a working game that is focused on this Reaction System. Basically it works like this:
Overall it's a very cinematic feel. You have a leader who is your "star". The star can have attributes that help or hinder him in some way. He's your Hollywood warrior, able to shrug off wounds that hurt lesser men. But he's not a hackneyed Sgt Rock. Despite being immune to death from lowly grunts, he still hunkers behind a wall in fear of getting his head blown off. He is still a real man, worried about his life. In fact, the high point of this game is that all your modes are real guys, so to speak.
Each model has a reputation rating (Rep), that drive just about everything from how he reacts to how he shoots. At first, I was confused but after a couple of run-throughs of the game it's a lot clearer. In fact, the rep is a very realistic portrayal of how a raw recruit might react under fire versus the battle hardened vet on his third campaign.
A battle report of the introductory scenario will help show things a little better. After that, I'll sum up what I like and dislike about the game so far.
First thing, I don't own any WWII figures. But have no fear! Thanks to Hing Fat Toy Company I now have full squads of Americans, Germans, British, and Japanese, all ready for the gaming table! Too bad they're 54mm figures. I'll keep using these until I can buy suitable replacements.

JUNE 1944 You're in command of a small group of paratroopers in France. Your unit has been dispersed all over the drop zone and is currently reforming. Right now it's just you and three others. Your major concern is to make it to the rally point. You are now coming up onto a ruined house. The squad crosses a road, filtering into the trees beyond. The ruined house is partially surrounded by a low stone wall. Woods are beside it. Two Germans are spotted standing outside, one sitting on the wall and the other leaning in the doorway of the ruins. Your men fan out, drop into a crouch as they take up positions at the edge of the treeline. Time to give Gerry hell!
So that's some writing from the book with my own additions. Enough with the Stephen Ambrose imitations! Here's turn one:
My turn has activation (like priority in LotR). This has an added twist in that you can only activate models whose rep equals or exceeds what you rolled for activation. So rolling low is best, as it allows you to move all models. This reflects hesitancy that a recruit would feel moving into fire. But since you can group up with a hi rep leader, it's not a problem.
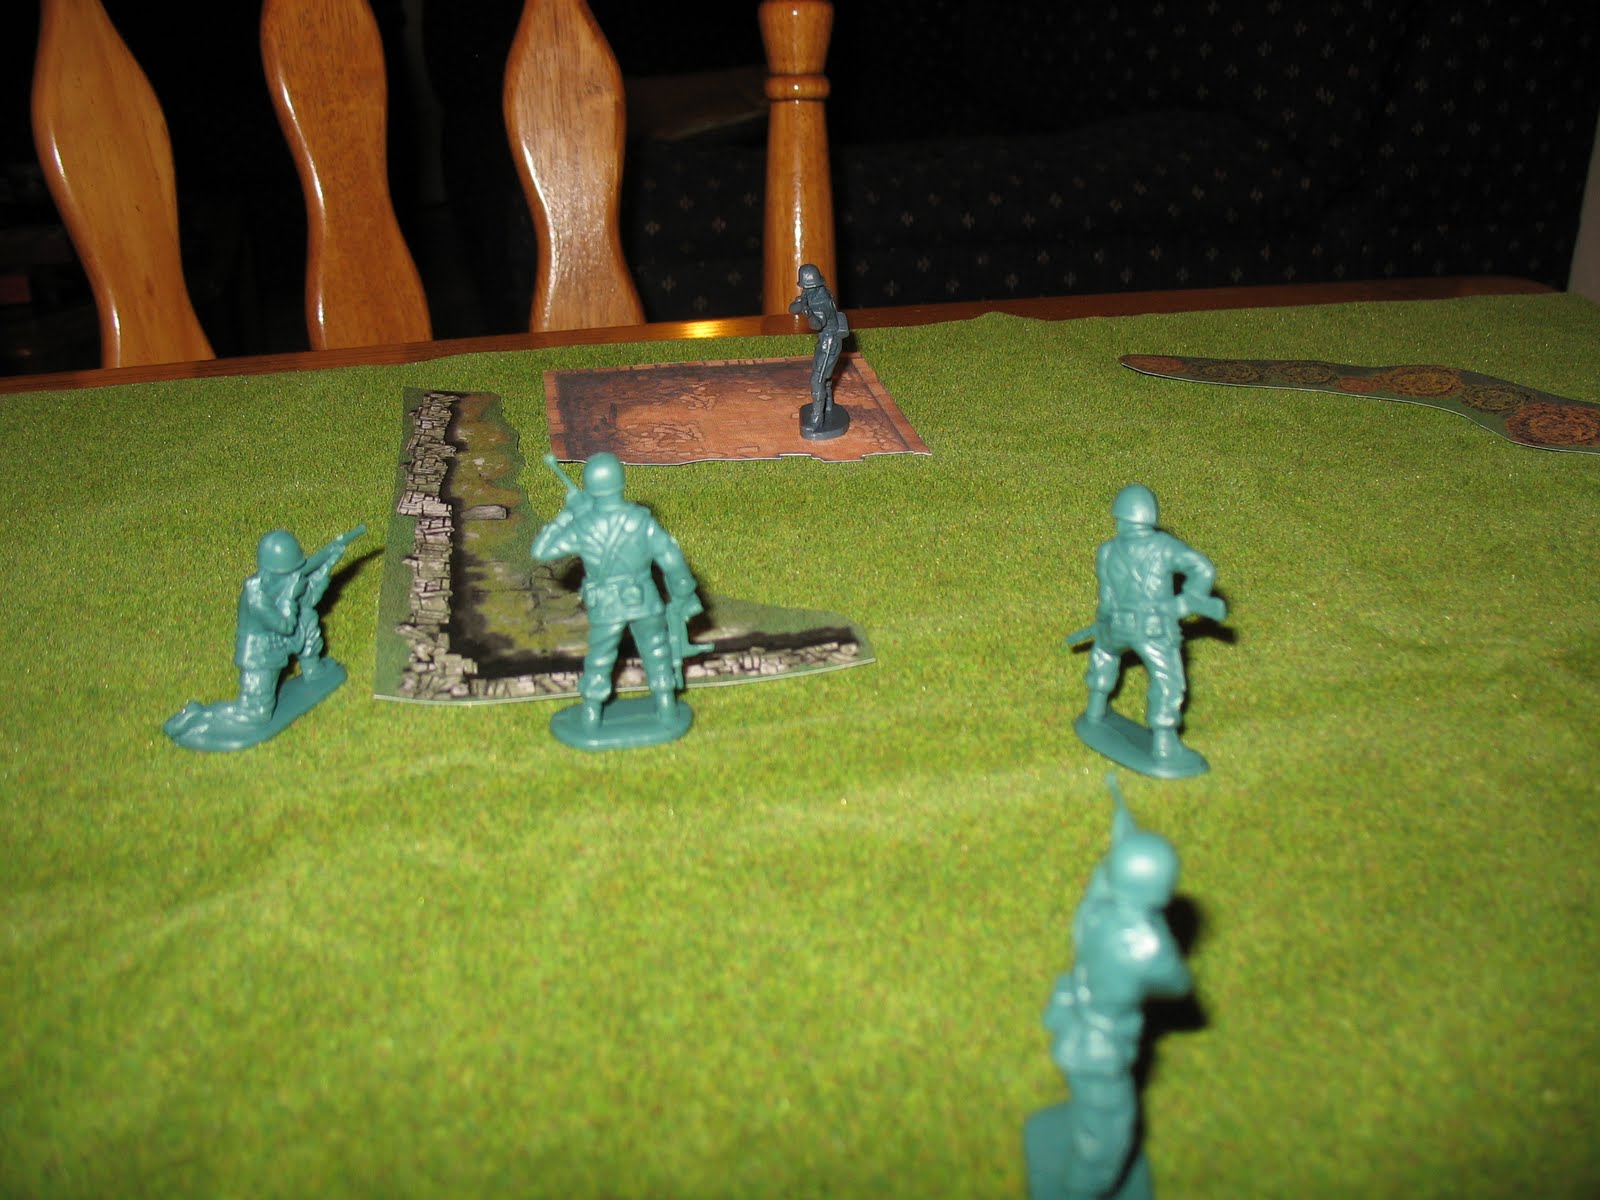
 Yes, that's paper cut out terrain. Don't laugh! I have no reason to own terrain (other than that niffty GW battle mat) and this actually looked pretty good in person. So as I was saying, both Dorfman on the wall and Engles in the door see me. They react by taking quick shots, which elicits return fire from the men being shot at and those within 4" of them. These shots fly back and forth with little effect due to cover and snap shooting. But the US Sgt (my star) puts his SMG to good use and kills Dorfman and forces Engles to retire, meaning he runs for safer cover. The shooting now reveals the location of other German troops. I roll on the chart provided with the mission and find that the German leader, Arnold, and machine gunner Beck and his loader Conrad are holed up in the ruins. So this won't be an easy fight to dislodge them!
It's turn two. Germans win the activation roll, but scored a five. The highest Rep is a 4, so they do nothing. They are surprised to suddenly come under withering fire and can't react! Engles is running and Dorfman is screaming for his mother. (Dorfman was not killed, but taken out of the fight. That means if a medic can reach him, he might be saved. It also has implications for campaign play. If the US catches him, they can kill him or take him prisoner. They'll have to guard him, if the want to do that. I digress!)
 Notice Engles behind that piece of card (which represents trees). He's hunkered down, meaning I don't see him. I could remove him and put a marker in his place. But I face him away to show that status. Now the US activates, and they had a roll of 2 which is way under the Sgt's rep of 5. So they start shooting like nuts. The LMG gunner is actually killed. Anyone around him of equal or lower rep takes a "man down test" to see if they'll move to safer cover. Arnold doesn't need to test, and Conrad merely wipes Beck's brains off his face and pulls out his own rifle. Too bad for that, because Private Baker kills him as well. Let me tell you this was fantastic shooting by the US. In my first games, I literally rolled reaction tests for 20 minutes with nothing happening. (That's something I'm going to fix with a house rule for sure!) Since no one can see Engles peeing himself in the woods, the turn ends.
Turn three and the German position is crumbling. The US paratroopers are sensibly remaining in cover, making them hard to hit with the unsteady and panicked return fire from the Germans. The Germans activate first. Since these are NPCs, I roll a focus test to see what they will pick for targets. Arnold may not be the bravest Nazi, but he knows what has to be done. He has an SMG and good chances to force back some of the US trooper facing him. He sprays three shots into the trees, forcing Private Able to retire. But return fire from the US Sgt takes Arnold out of the fight, toppling back into the ruins with a gurgled scream. The next German group to activate is poor Engles. He becomes more frightened, decides the trees are not enough protection and makes for the ruins. Since he is still considered "hunkered down" the US doesn't see him thread his way back to the ruins.
It's now time for the US to activate. Private Able rallys and the Sgt gives the order to run for the wall. They're going to storm the ruins and clear it out for sure. Private Baker readies a grenade (by passing a test) and can throw it when in range. The US paratroopers line up on the wall, Private Baker hauls back and throws it perfectly. They now see Engles whimpering inside, balled up like a kid who lost his security blanket.
 The ruins aren't enough to ward off a grenade. A cloud of dust and debris belches from the small house and then all is silent. Engles is taken out of the fight (maybe he's barely alive, deaf and dazed under the rubble), and so the area is cleared. Victory for the US! Now to get to that rally point!
So, Nuts! is a fun game. What I like is the cinematic feel, the individuality of the models, and the fluidity of the fights. What I don't like is throwing dice for every damn thing all the damn time. Maybe it's because I'm playing solo, but there are so many tests to take, I'm always rolling dice.
There's also vehicle rules and rules for artillery guns. On the THW Yahoo group you can download rules for mortar fire (which seems a glaring omission from these rules) and for artillery barrages. The game is definitely meant to be played with a platoon at most. If I played this at the platoon level solo, there's no way I could do it in two hours! All those reaction tests followed by reaction tests! But for a few squads this is really a great game. It takes some getting used to the reaction system. But it's starting to clear up for me. I'll test out the vehicle rules next, using some of my 15mm FoW stuff for that.
Overall, I think Nuts! is a great game with a lot of potential for story and campaign based gaming. I'll keep you posted on where I go with it next.
Enter Nuts! by Two Hour Wargames. Doing WWII at a skirmish level is what I wanted, just taking a platoon or so. (Flames of War is my game for company level action.) I read the website, liked what was described, thought that this rules set might be the thing for me. Interestingly enough, the game can be played traditionally in a head-to-head game, or as co-op or solo play. In fact, the rules are geared toward co-op/solo. So that sold me the rules. I got the PDF file as soon as I sent payment, and the printed rule book arrived in a few days. Here are my impressions and a short battle report. Don't miss the report!
The rules are unlike anything I've seen before. The core difference in Nuts! is in the use of the Reaction System. I was not ready for that when I opened the rulebook. Turns out, you can get a couple of free rules sets that will give you a working game that is focused on this Reaction System. Basically it works like this:
- I activate and move into your LoS
- You see me and react
- I will react, and we could end up shooting at each other, running away, freezing in place, etc.
- Our reactions will cause further reactions, sometimes from figures nearby.
- Things continue until something happens to end the chain reactions (death, duck into cover, etc)
Overall it's a very cinematic feel. You have a leader who is your "star". The star can have attributes that help or hinder him in some way. He's your Hollywood warrior, able to shrug off wounds that hurt lesser men. But he's not a hackneyed Sgt Rock. Despite being immune to death from lowly grunts, he still hunkers behind a wall in fear of getting his head blown off. He is still a real man, worried about his life. In fact, the high point of this game is that all your modes are real guys, so to speak.
Each model has a reputation rating (Rep), that drive just about everything from how he reacts to how he shoots. At first, I was confused but after a couple of run-throughs of the game it's a lot clearer. In fact, the rep is a very realistic portrayal of how a raw recruit might react under fire versus the battle hardened vet on his third campaign.
A battle report of the introductory scenario will help show things a little better. After that, I'll sum up what I like and dislike about the game so far.
First thing, I don't own any WWII figures. But have no fear! Thanks to Hing Fat Toy Company I now have full squads of Americans, Germans, British, and Japanese, all ready for the gaming table! Too bad they're 54mm figures. I'll keep using these until I can buy suitable replacements.

JUNE 1944 You're in command of a small group of paratroopers in France. Your unit has been dispersed all over the drop zone and is currently reforming. Right now it's just you and three others. Your major concern is to make it to the rally point. You are now coming up onto a ruined house. The squad crosses a road, filtering into the trees beyond. The ruined house is partially surrounded by a low stone wall. Woods are beside it. Two Germans are spotted standing outside, one sitting on the wall and the other leaning in the doorway of the ruins. Your men fan out, drop into a crouch as they take up positions at the edge of the treeline. Time to give Gerry hell!
So that's some writing from the book with my own additions. Enough with the Stephen Ambrose imitations! Here's turn one:
My turn has activation (like priority in LotR). This has an added twist in that you can only activate models whose rep equals or exceeds what you rolled for activation. So rolling low is best, as it allows you to move all models. This reflects hesitancy that a recruit would feel moving into fire. But since you can group up with a hi rep leader, it's not a problem.

It's turn two. Germans win the activation roll, but scored a five. The highest Rep is a 4, so they do nothing. They are surprised to suddenly come under withering fire and can't react! Engles is running and Dorfman is screaming for his mother. (Dorfman was not killed, but taken out of the fight. That means if a medic can reach him, he might be saved. It also has implications for campaign play. If the US catches him, they can kill him or take him prisoner. They'll have to guard him, if the want to do that. I digress!)

Turn three and the German position is crumbling. The US paratroopers are sensibly remaining in cover, making them hard to hit with the unsteady and panicked return fire from the Germans. The Germans activate first. Since these are NPCs, I roll a focus test to see what they will pick for targets. Arnold may not be the bravest Nazi, but he knows what has to be done. He has an SMG and good chances to force back some of the US trooper facing him. He sprays three shots into the trees, forcing Private Able to retire. But return fire from the US Sgt takes Arnold out of the fight, toppling back into the ruins with a gurgled scream. The next German group to activate is poor Engles. He becomes more frightened, decides the trees are not enough protection and makes for the ruins. Since he is still considered "hunkered down" the US doesn't see him thread his way back to the ruins.
It's now time for the US to activate. Private Able rallys and the Sgt gives the order to run for the wall. They're going to storm the ruins and clear it out for sure. Private Baker readies a grenade (by passing a test) and can throw it when in range. The US paratroopers line up on the wall, Private Baker hauls back and throws it perfectly. They now see Engles whimpering inside, balled up like a kid who lost his security blanket.
So, Nuts! is a fun game. What I like is the cinematic feel, the individuality of the models, and the fluidity of the fights. What I don't like is throwing dice for every damn thing all the damn time. Maybe it's because I'm playing solo, but there are so many tests to take, I'm always rolling dice.
There's also vehicle rules and rules for artillery guns. On the THW Yahoo group you can download rules for mortar fire (which seems a glaring omission from these rules) and for artillery barrages. The game is definitely meant to be played with a platoon at most. If I played this at the platoon level solo, there's no way I could do it in two hours! All those reaction tests followed by reaction tests! But for a few squads this is really a great game. It takes some getting used to the reaction system. But it's starting to clear up for me. I'll test out the vehicle rules next, using some of my 15mm FoW stuff for that.
Overall, I think Nuts! is a great game with a lot of potential for story and campaign based gaming. I'll keep you posted on where I go with it next.
Thursday, April 28, 2011
Isildur's Bane
As I promised a few posts back, I wanted to test the Isildur's Bane rules set. This is an adaptation of the Lord of the Rings Strategy Battle Game rules to allow for solo play. I wanted to try solo play to test out new armies or new units before playing a real game. While I could just line up two armies and roll dice as usual, it's better when there's some randomness involved.
I won't get too involved with the rules. The link I provided will take you to these. I'll just give the key differences. The move and shoot phases are combined. Priority is replaced with an activation phase that is determined by randomly drawn cards. There's no heroic actions and the use of might is determined by making a might roll. Otherwise, all other LotR rules apply. There's a lot to cover; so let's get started.
I picked two forces I own but have never played and used 175 pts for the size. I rolled up a Legions of Middle Earth game. Seize the Artifact was the scenario. I set up a 2'x2' board and gave myself a 3" deployment rather than the standard 6" zone. The evil side was a Barad-dur force of Morranon and garden variety Orcs, a horrifying visage of unpainted plastic. The good side was Rivendell Elves, fully painted and wearing freshly starched capes. The artifact went to the middle of the board: a pot of Tin Bitz paint. The Orcs coveted its pigment, and the Elves could not abide color falling into the clutches of evil. It was going to be a tough fight.
The rules don't say anything about how to select table sides. I just rolled for the elves and gave the orcs the other side. I set up, divided into groups, and dealt activation cards. Groups with a hero get red cards, which mean these groups go first. Other groups get black cards and go after the red. Suits determine order and so does Ace thru King. Groups can be single models up to ten models. They just have to be within 4" of each other to start. I split my groups up into archer versus non archer units. Here's what my magnificent game board looked like at the start.
 Whichever side moves first gets what is called "the edge." This means that during combat you make the best tactical decisions for whichever side has the edge. However, since movement means a lot in this game, I gave the edge throughout the whole turn. This made a difference later on, which I'll explain when I get there.
Turn One
You can see from the cards in the picture above that the Elf Captain and his swordsman go first, followed by the Orc Captain and his wild bunch. Finally Elves shoot and Orcs shoot. On turn one, the Elves pick off one of the two orcs on the hill. The remaining Orc archer misses his return fire. The other forces simply move forward to the artifact. The orcs realize it's a metallic paint and simply go nuts for it.
Turn Two
 The Orcs are going first (hearts go before diamonds) and get the edge. So they swarm the artifact,with a defensive line going before it and a 2hd weapon grunt getting into base with the artifact. The Elf Captain
and Tennille engage the Orc line. The orcs have set up with spear support and wide enough to prevent an end run around them. Next comes the Elf archers, they shift out 3" and shoot at the Orc on the artifact, killing him, and shoot out another orc spear supporting. (This is the combined move and shoot phase, remember?) The lone orc bowman reaffirms his uselessness. The fight phase goes as expected with Elves winning but not wounding. The Elf Captain uses his Elven blade to wound the Orc Captain. If a model has Fate points, a fate roll is required whenever a wound is suffered. The orc fails it and is wounded. Interestingly enough, the orcs are pushed back onto the artifact and now get to dig for it. They succeed and are the proud owners of 10ml of Tin Bitz, artifact grade!
Turn Three
The orcs go first and the Orc Captain and his warriors lock down all the Elven swordsmen and Captain. The lone orc with his artifact starts to run. Since the orcs had the edge, I should've had two orcs escort the artifact. But I wasn't thinking about that. The Elf warriors go next but are locked down, so now the archers come up and shoot. The Orc artifact bearer dies and drops the artifact about 7" from the table edge. The archers shoot out another spear support. The close combats are a repeat from before, but at least they kill one orc. I used Elven blades to crack the D6. The orc archer again achieves nothing. Now the orcs are one away from 50% break point and the Elves are untouched.
Turn Four
 The orcs go first and therefore have "the edge." So I make moves that tactically benefit them most. You can see from the picture above there's an elf able to reach the artifact. (I switched to an artifact token, since the paint pot was getting in the way.) While I was "routing for" the elves, I had to pick up that open elf to keep him away from the artifact. The Elf warriors are again tied up. But the elf archers go next and shoot out a spear supporting orc. This breaks the orcs. Now when the archer is activated, he takes a courage check and fails. The hand to hand fights get a little more deadly this turn, with one elf and one orc dying. I used Elven blades again on any D6 model.
Turn Five
 The elves are now on the attack and go first. They engage all the remaining orcs and one elf moves to pick up the artifact. The archers have nothing to do but move up. The Orc and Elf captains are fighting. The Elf captain wins but rolls box cars on his wound rolls. It's starting to get silly. Another orc falls to an Elven blade.
Turns Six & Seven
The Elves have the edge, so I make the best decisions for them. The orcs could still reach the artifact bearer if they pass courage checks. It only takes the captain to pass and everyone else will stand fast. So I re-engage all the orcs while the lone elf picks up the artifact. The Elf archers join the fight and trap the Orc captain. During that fight, the Orc captain shields and the wins the fight, rolling a six to the elves' five. I make a might check for the Elf Captain. He passes and bumps his roll to a six, and now wins base on his fight value. At last the orc captain is vanquished. All but one orc is killed. On the following turn, the Elves move to 1" of the table edge with the artifact. The last orc actually rolls a 12 for his courage check! It's useless at this point and just runs from the Elves. I call it here, since there's nothing left to do.
Major Victory to the Elves! Here they are with their prize.

Overall I thought it was a fun game. The concept of the edge made sure I wasn't always favoring one side. I also got to learn some things about my force. I didn't think three bows would be "all that" but for this points level they were very good. I was surprised how tough the Elves were to crack, but very unimpressed with their ability to kill. Elves won almost every fight, but were pressed to hurt anything. I was surprised to see that for Elf bows being S3 it didn't make any difference for rolling to wound. The bows may as well have been S2. For Orcs, I realized regular Orc bows are pitiful in range and accuracy. They are only useful for creating a nuisance, but probably shouldn't be given important objectives.
So will I play Isildur's Bane again? I'm certain I will. This 175 pt match on a small table only took one hour from busting out the figures to cleaning up when done. It took me longer to write this post! I guess I wished there was more unpredictability in the game. But the "edge" concept did compensate for knowing both sides' strategies. Overall, I think this is a great rules set and would recommend it to anyone wanting to brush up on rules, scenarios, or just try something different.
I won't get too involved with the rules. The link I provided will take you to these. I'll just give the key differences. The move and shoot phases are combined. Priority is replaced with an activation phase that is determined by randomly drawn cards. There's no heroic actions and the use of might is determined by making a might roll. Otherwise, all other LotR rules apply. There's a lot to cover; so let's get started.
I picked two forces I own but have never played and used 175 pts for the size. I rolled up a Legions of Middle Earth game. Seize the Artifact was the scenario. I set up a 2'x2' board and gave myself a 3" deployment rather than the standard 6" zone. The evil side was a Barad-dur force of Morranon and garden variety Orcs, a horrifying visage of unpainted plastic. The good side was Rivendell Elves, fully painted and wearing freshly starched capes. The artifact went to the middle of the board: a pot of Tin Bitz paint. The Orcs coveted its pigment, and the Elves could not abide color falling into the clutches of evil. It was going to be a tough fight.
The rules don't say anything about how to select table sides. I just rolled for the elves and gave the orcs the other side. I set up, divided into groups, and dealt activation cards. Groups with a hero get red cards, which mean these groups go first. Other groups get black cards and go after the red. Suits determine order and so does Ace thru King. Groups can be single models up to ten models. They just have to be within 4" of each other to start. I split my groups up into archer versus non archer units. Here's what my magnificent game board looked like at the start.

Turn One
You can see from the cards in the picture above that the Elf Captain and his swordsman go first, followed by the Orc Captain and his wild bunch. Finally Elves shoot and Orcs shoot. On turn one, the Elves pick off one of the two orcs on the hill. The remaining Orc archer misses his return fire. The other forces simply move forward to the artifact. The orcs realize it's a metallic paint and simply go nuts for it.
Turn Two

 |
| 2 Handed weapons are great for removing stubborn paint caps. |
Turn Three
The orcs go first and the Orc Captain and his warriors lock down all the Elven swordsmen and Captain. The lone orc with his artifact starts to run. Since the orcs had the edge, I should've had two orcs escort the artifact. But I wasn't thinking about that. The Elf warriors go next but are locked down, so now the archers come up and shoot. The Orc artifact bearer dies and drops the artifact about 7" from the table edge. The archers shoot out another spear support. The close combats are a repeat from before, but at least they kill one orc. I used Elven blades to crack the D6. The orc archer again achieves nothing. Now the orcs are one away from 50% break point and the Elves are untouched.
Turn Four

Turn Five

Turns Six & Seven
The Elves have the edge, so I make the best decisions for them. The orcs could still reach the artifact bearer if they pass courage checks. It only takes the captain to pass and everyone else will stand fast. So I re-engage all the orcs while the lone elf picks up the artifact. The Elf archers join the fight and trap the Orc captain. During that fight, the Orc captain shields and the wins the fight, rolling a six to the elves' five. I make a might check for the Elf Captain. He passes and bumps his roll to a six, and now wins base on his fight value. At last the orc captain is vanquished. All but one orc is killed. On the following turn, the Elves move to 1" of the table edge with the artifact. The last orc actually rolls a 12 for his courage check! It's useless at this point and just runs from the Elves. I call it here, since there's nothing left to do.
Major Victory to the Elves! Here they are with their prize.


Overall I thought it was a fun game. The concept of the edge made sure I wasn't always favoring one side. I also got to learn some things about my force. I didn't think three bows would be "all that" but for this points level they were very good. I was surprised how tough the Elves were to crack, but very unimpressed with their ability to kill. Elves won almost every fight, but were pressed to hurt anything. I was surprised to see that for Elf bows being S3 it didn't make any difference for rolling to wound. The bows may as well have been S2. For Orcs, I realized regular Orc bows are pitiful in range and accuracy. They are only useful for creating a nuisance, but probably shouldn't be given important objectives.
So will I play Isildur's Bane again? I'm certain I will. This 175 pt match on a small table only took one hour from busting out the figures to cleaning up when done. It took me longer to write this post! I guess I wished there was more unpredictability in the game. But the "edge" concept did compensate for knowing both sides' strategies. Overall, I think this is a great rules set and would recommend it to anyone wanting to brush up on rules, scenarios, or just try something different.
Monday, April 18, 2011
The Merits of Practice
Whenever I get a new army together, it usually takes three or four games for me to understand how the force plays and how its special rules work. Sometimes things that I think I "get" don't actually work as I thought. A case in point is my understanding of the "impaler" rule for my Far Harad raiders. Another thing that happens a lot is forgetting special rules. I had to play my Corsairs at least ten times before I stopped forgetting about their throwing weapons.
For most people, the antidote to these problems is to get in a lot of games with the army. As you go, you learn how the force plays and the nuances of its special rules. However, there are some cons to this approach. You might have purchased models that you no longer want in your force, (I'm looking at you, Corsair Arbalesters) or not enough models to make the unit useful. Since you will be stumbling along, you might enjoy your games less and become frustrated with your army. Finally, you might have limited gaming time, therefore prolonging the time to get accustomed to your new army. Trying to solve for all these issues at once seems impossible. But there might be a solution.
Solo play would allow you to address each of these issues. For starters, the entire issue of limited time is solved as your gaming partner is available when you are. Since you will be playing a solo game, you can proxy models to try out different units. You don't even have to use models. You can use paper chits or spare bases with labels. After all, you are just testing out options or checking to see if you like a certain army. If you make stupid mistakes, you can keep that to yourself. Even if not trying to solve for anything specific, the repetition of "the basics" will improve your game.
When I first learned WHFB years ago, I walked through the rules using the Orcs versus Empire models that came with the starter box. I've done this for FoW and other games as well. These sessions helped get the rules into my head. But the solo play rules walk-thru is different from a game where you are trying to meet scenario objectives while dealing with the unpredictable movements of an opponent. You need to be able to surprise yourself. That usually only happens to me when bouncing checks.
This has been a long way around the barn to get to what I want to say. I was thinking of how I might be able to play LotR as a solitaire game. I mainly wanted to do this as a way to learn how some of my newer armies play. But I'd also like to be able to check out other forces before I invest in them. A quick web search revealed that I am not alone in the endeavor.
I found Isildur's Bane, which is a "hack" of the LotR game to allow for solo play. I read through the rules and think that this will fit the bill. I actually set up five models for each side and tested it out. It works! It's not exactly the same game. Move and shoot phases are combined and there are no heroic actions. A test with five models a side was just a way to see if things made sense. I will now have to test out the game with a larger force.
So I'll be hosting a "Battle of the Unpainted Armies" some time this week. I've got about 250pts of Orcs and easily that much of Elves. I've never played either side, so this will be a great test. I don't have much in terms of terrain to make things more interesting. I plan on using just a 2' x 2' board to keep things moving fast. I haven't decided on a scenario either. Maybe I'll make up my own. At any rate, I will post up the results of my test game. Stay tuned!
Subscribe to:
Posts (Atom)